
Crawl spaces are among the most neglected areas in Northern Virginia homes — and that neglect comes with a cost. Unsealed dirt crawl spaces act like giant moisture sponges, drawing ground moisture upward into the home’s structural framing, subfloor, and insulation. When moisture meets wood and insulation in a dark, poorly ventilated space, crawl space mold remediation in Northern Virginia becomes unavoidable. Understanding what the process involves — and why encapsulation is the only durable long-term solution — can save you thousands in repeat remediation costs.
Why Northern Virginia Crawl Spaces Are So Mold-Prone
Northern Virginia’s geological profile is dominated by heavy clay soils in Fairfax, Loudoun, and Prince William counties. Clay soils drain slowly, hold water against foundation walls and under slabs, and create persistently high groundwater tables that generate hydrostatic pressure against crawl space perimeter walls. The region’s humid continental climate — hot, sticky summers and cool, damp springs — adds to the moisture load that enters crawl spaces through diffusion, evaporation, and condensation.
Many Northern Virginia homes built in the 1960s through 1990s have crawl spaces with only a thin, degraded plastic sheeting on the dirt floor — or none at all. These homes rely on passive ventilation through foundation vents, an approach that has been largely abandoned in modern building codes because it actually pulls humid outdoor air into the crawl space during summer months, making the moisture problem worse.
Signs You Need Crawl Space Mold Remediation
Because crawl spaces are rarely visited, mold can grow extensively before homeowners notice it. Watch for these indicators:
- Musty or earthy odors when entering the home, especially in lower-level rooms
- Wood floors that feel soft, springy, or have noticeable bounce — signs of compromised subfloor joists
- Elevated humidity readings in first-floor rooms during summer months
- Pest activity — rodents, roaches, and other insects are drawn to moist crawl spaces
- Higher-than-expected cooling costs from HVAC systems working harder to manage moisture
- Visible dark staining on floor joists or rim joists when you do inspect the crawl space
A professional mold inspection with thermal imaging and moisture meters can identify the extent of contamination before you commit to a remediation scope. Learn more about the full inspection process in our guide to mold testing vs. inspection in the DMV.
The Crawl Space Mold Remediation Process
Step 1 — Inspection and Scope Development
Before work begins, a certified inspector documents all affected areas, measures moisture content in structural members, assesses insulation condition, and identifies all moisture entry points. This information drives the remediation scope and prevents work being underestimated or overscoped.
Step 2 — Insulation Removal
Fiberglass batt insulation installed between floor joists is notoriously mold-prone because it traps moisture against wood framing while providing organic material for mold to colonize. Contaminated insulation is removed entirely, double-bagged, and disposed of at a licensed facility. Attempting to treat insulation in place is ineffective and non-compliant with IICRC S520 standards.
Step 3 — Mold Treatment on Structural Wood
Exposed floor joists, rim joists, and the sill plate are HEPA-vacuumed and treated with EPA-registered antimicrobials and, where appropriate, borate-based wood preservatives that penetrate the wood grain to prevent future colonization. Heavily damaged structural wood that has lost load-bearing integrity is flagged for replacement by a licensed contractor.
Step 4 — Structural Drying
Industrial dehumidifiers and air movers dry the crawl space and structural wood to below 16% moisture content — the threshold above which mold cannot sustain growth. This drying phase typically takes 24 to 72 hours depending on the size of the space and initial moisture levels.
Step 5 — Encapsulation
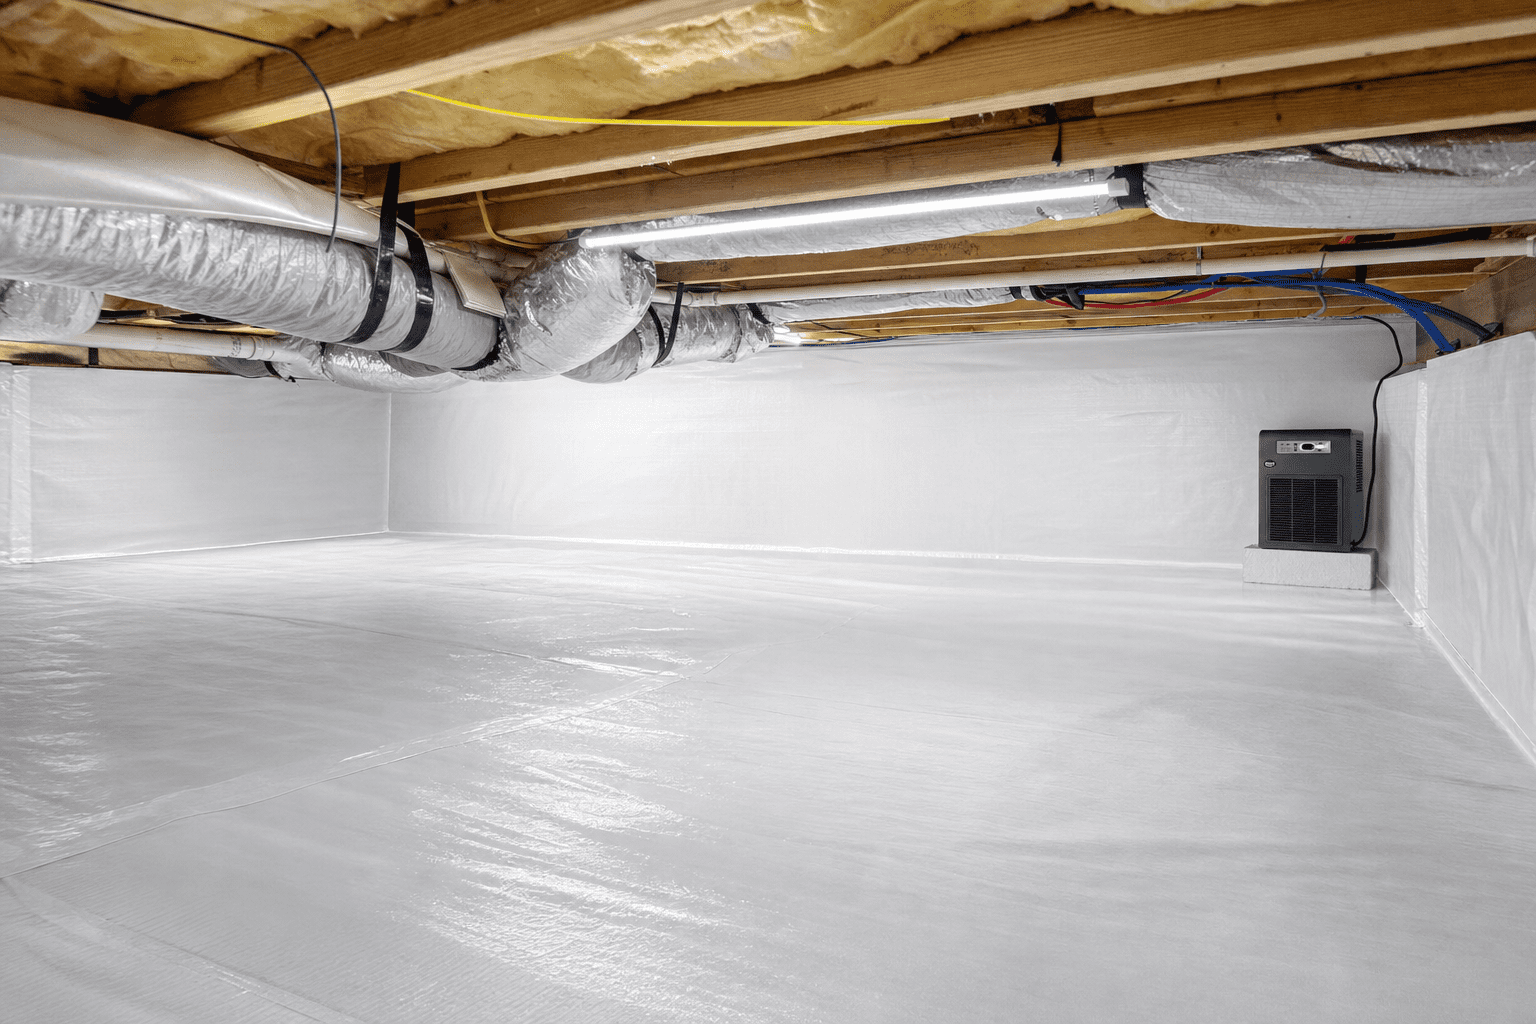
Encapsulation is the critical step that transforms a chronically wet crawl space into a sealed, conditioned environment. A reinforced polyethylene vapor barrier (typically 12–20 mil thickness) is installed across the entire floor and up the foundation walls, sealed at seams and at all penetrations. The goal is to eliminate soil moisture evaporation as an input entirely.
True encapsulation also includes sealing or conditioning the crawl space — either by closing foundation vents and conditioning the space with a dedicated dehumidifier, or by connecting it to the home’s HVAC system. A standalone, properly sized dehumidifier with an automatic drain line is the most practical solution in most Northern Virginia crawl spaces.
Step 6 — Post-Clearance Verification
Post-remediation moisture readings and, where indicated, post-clearance air sampling confirm that the space has been returned to acceptable conditions. This documentation is valuable for insurance purposes and for the next buyer if you sell the home.
Encapsulation vs. Simple Vapor Barrier: What’s the Difference?
Many Northern Virginia homeowners confuse basic vapor barrier installation with full encapsulation. A basic vapor barrier is typically 6-mil thin-film sheeting loosely laid on the crawl space floor. It helps marginally but still allows moisture to penetrate at seams, around columns, and at the foundation walls.
True encapsulation uses heavier-duty material (12–20 mil reinforced barrier), is sealed at all seams with tape and fasteners, is run up the full height of the foundation wall and sealed at the top, and is combined with a drainage system and active dehumidification. The cost difference is significant, but so is the durability — basic vapor barriers routinely fail within a few years while proper encapsulation can last decades.
Crawl Space Mold and Your Home’s Air Quality
The stack effect in Northern Virginia homes — where air pressure differences drive air from lower to upper levels — means that a mold-contaminated crawl space is constantly pushing spore-laden air into your living spaces. Research suggests that a significant portion of the air in a home’s ground floor has passed through the crawl space below it. This means that mold in your crawl space is not an isolated problem confined to an area no one enters; it is actively degrading the air quality throughout your home.
Residents with mold allergies vs. mold-related illness may find their symptoms improve significantly after a properly executed crawl space encapsulation project — not just remediation, but the moisture elimination that prevents regrowth.
Northern Virginia Contractor Requirements
Virginia requires mold remediation contractors to hold a Class A or B Contractor License from the Department of Professional and Occupational Regulation (DPOR). Always verify that your contractor is properly licensed before signing a contract. Reputable contractors will also carry general liability insurance and workers’ compensation coverage and will provide proof on request.
For homeowners in Fairfax County specifically, see our detailed guide to mold inspection in Fairfax County VA.
AEO Recap: Crawl Space Mold Remediation in Northern Virginia
- Clay soils and humid summers make Northern Virginia crawl spaces high-risk mold environments
- Contaminated insulation must be removed — treatment in place is ineffective and non-compliant
- Structural wood is treated with EPA-registered antimicrobials and, where appropriate, borate preservatives
- Encapsulation is the permanent solution — basic vapor barriers are insufficient and fail prematurely
- Active dehumidification maintains safe humidity year-round after encapsulation
- Verify DPOR licensing before hiring any Northern Virginia mold remediation contractor
Frequently Asked Questions
How long does crawl space mold remediation take in Northern Virginia?
Most residential crawl space projects take two to four days: one day for insulation removal, treatment, and HEPA vacuuming; one to two days for structural drying; and one day for vapor barrier or encapsulation installation. Larger or severely contaminated spaces may take longer. Post-clearance testing adds time for lab results.
Can I encapsulate a crawl space with existing mold?
No. Mold must be fully remediated before encapsulation is installed. Sealing mold under a vapor barrier traps it in a dark, potentially still-damp environment where it continues to damage structural wood. Encapsulation is the last step, not a shortcut to skip remediation.
Will my homeowner’s insurance cover crawl space mold remediation?
Coverage depends on the cause of moisture intrusion. Mold resulting from a sudden, covered water event (burst pipe, appliance failure) may be covered. Mold from chronic moisture — which describes most Northern Virginia crawl space situations — is typically excluded as a maintenance issue. Review your policy and document any water events promptly.
How do I maintain a crawl space after encapsulation?
An encapsulated crawl space requires annual inspection to verify that the vapor barrier is intact, the dehumidifier is draining properly and operating within the target humidity range (below 55% RH), and no new moisture entry points have developed. Most homeowners check it seasonally, especially after heavy rainfall or snowmelt events.
Does mold in a crawl space affect my home’s value in Northern Virginia?
Yes. Virginia requires sellers to disclose known material defects, and crawl space mold qualifies. Buyers will often request remediation or a price reduction equivalent to the remediation cost when mold is found during inspection. A properly remediated and encapsulated crawl space, with clearance documentation, is a selling point — not a liability.
Get a Crawl Space Assessment in Northern Virginia
DMV Mold provides certified crawl space mold inspections and full-service remediation with encapsulation throughout Fairfax, Arlington, Loudoun, Prince William, and Alexandria. Don’t let a moisture-damaged crawl space compromise your home’s structure and your family’s air quality.
Contact DMV Mold today to schedule your crawl space assessment and get a detailed written estimate.